
Film Shield for Polaroid Cameras

Konnichiwa!
It’s Bob from Bob’s Polaroid Works! Welcome back to my garage!
This time, I wrote about the flog tongue (a.k.a Film Shield) for Polaroid Box-Type Cameras!
Please enjoy your time at my garage!
Bob’s Polaroid Worksをご覧いただきましてありがとうございます!
こちらへの投稿は英語と日本語どちらでも行なっています!
状況により、どちらかの言語の記事が先に投稿される場合がございますが、ページのプラグインでGoogle翻訳が利用可能ですので、英語記事を読む際はご活用ください!
Google翻訳はページ下部にて設定できます!
*この記事は日本語版があります!
Chapters
- What’s the Frog Tongue/Film Shield?
- How to Identify Box-Type Polaroid Cameras and Folding Polaroid Cameras
- How to Install Frog Tongue for your Polaroid Box Camera
- Summary
What’s The Frog Tongue/Film Shield?
As Polaroid films’ characteristics, those films could be exposed after the shots. Even though the photo has been ejected from the camera. Light shading is the first step to create better and vivid works on Polaroid!
I know we have struggled with light shading on vintage Polaroid Cameras. But Polaroid’s Frog Tongue/Film Shield is the best solution for us!
The official name of frog tongue is just “Film Shield,” but many “Polaroiders” might call it “Frog Tongue” because its mechanism!
Post Impossible Polaroid Cameras, e.g., Impossible I-1, Polaroid OneStep+, and Polaroid Now have built-in Frog Tongue as it assembled!
Thus, there is no need to pay extra for a Frog Tongue if you have newer Polaroid Cameras such as above!
As its availability, there are two variations of Polaroid Film Shield; for folding SLR* Polaroid cameras such as SX-70, and for Box-type Polaroid Cameras!
*Except for SX-70 model 3
So this time, let me introduce you to the Film Shield for Box-Type Polaroid Cameras!
How to Identify Box-type Polaroid Cameras and Folding Polaroid Cameras
As its Product name “Box-Type Camera Film Shield,” this accessory is not compatible with Polaroid folding cameras such as SX-70. There is another product for folding Polaroid cameras, so I will introduce it respectively!
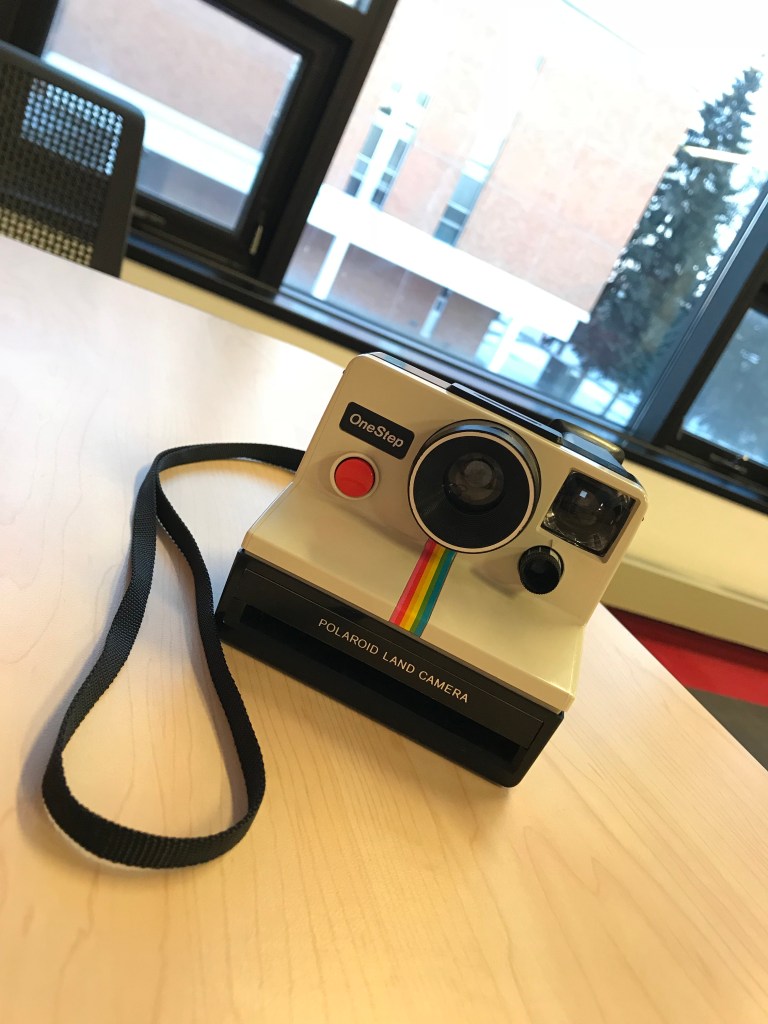
As you may know, two major categories of Polaroid cameras use the general Polaroid Films. (i.e., uses SX-70 film, 600film, i-Type film); Folding Camera and Box-Type Camera.
To name the example of the models of each category. For Folding Polaroid Cameras, i.e., SLR cameras; SX-70, SLR670, 680, and 690. For Box-Type Cameras; Polaroid OneStep (first model)/Polaroid 1000, Polaroid Sun 660 Autofocus and Close Up 636.

There are two easy ways to identify which type of camera you have.
One is to check the viewfinder. For folding Polaroid cameras (Except for SX-70 model 3), introduced SLR mechanism. When you look through the viewfinder, you see the exact same as how the film will be exposed.
On the other hand, the Box-Type Polaroid Camera has a separate viewfinder from the shooting lens. So the composition that you make with Box-Type Camera’s viewfinder is not precisely the same as the film will be exposed.
Two is to check the outline of your camera and find out where the viewfinder is located.
As I explained, the viewfinder is the key difference between these categories.
When you look at the camera from the front, folding Polaroid Cameras, the viewfinder is located at the center of the camera (including SX-70 model 3). The other’s is situated on the side of the camera.
Anyway, if you can’t fold the camera completely, including the viewfinder, that is a Box-Type Camera!
How to Install Frog Tongue for your Polaroid Box Camera
What you need are…
- Box-Type Polaroid Camera
- Polaroid’s Box-Type Camera Film Shield
- Flat-head screwdriver

Installation
1. Open the Film-Door of Your Camera
As you reload the film pack, use the film door latch at the side of your camera to open.
2. Use the flat-head screwdriver to remove the front panel of the film-door.

There are three catches to hold the front panel. To clear this, release two of them on the right and left sides, circled above.
Be careful when you do this. You may break the catch if you push them too hard.
Once you release the catch, the front panel can be removed easily!
As you have done, let’s move on to the next step!
3. Attach the Film Shield to the Front Panel
The Front Panel has several guides to place precisely on the camera.
And the film shield also has some holes that match the guide!
When you attach the film shield to the front panel, check the letters on the front side to make sure you put it upside down!

4. Situate the film shield attached front cover to the camera.
After attaching the film shield to the front panel, the last step is to situate the front panel as it was.
As I explained, some guides and catches are on the front panel, so you won’t miss it align.
When you are done, you are ready to shoot!

Summary
Here I talked about the What and How of Polaroid Frog Tongue/Film Shield!
I’m planning to introduce the frog tongue for folding Polaroid Cameras!
Stay tuned for the next blog on Bob’s Polaroid Works!
If you have any questions about this article, feel free to leave comments or send me an email from the contact!
Thanks for your time, and I’m looking forward to seeing you again at my garage!
Bob

#Polaroid
How to use SX-70, How to, Polaroid, Polaroid SX-70, Polaroid Camera, Photography, Analog Photo, Instant Photo, Instax, Instagram, Street photography, Old Camera, Film Camera, Single lens reflex camera, Frog Tongue, Box Camera, Film Shield
SX-70使い方、ポラロイド、ポラロイドSX-70、SX-70とは、使い方、ポラロイドカメラ、写真、写真生活、ポラロイド生活、ボックスカメラ、フロッグタン、フィルムシールド

Ciao, dove posso comprare frog tongue per polaroid 1000? Ho rotto un fermo per togliere il vecchio. È grave?
LikeLike
Ciao Simona, grazie per il tuo commento. La pellicola protettiva non è obbligatoria ma consigliata per i migliori risultati! Puoi ottenere l’oggetto da https://prf.hn/click/camref:1101ljTWa/%5Bp_id:1101l428412%5D > Accessorio e ottenere la “Polaroid Film Shield – Box Type Cameras!”
LikeLike